Patient & Practitioner Contact Editor
Once logged into the AIC web application, the first page to be presented is the Contact editor. This page is where you can look up patients or practitioners and return all their contact information. In turn, this information can be viewed and/or modified from this page.
How to Search
The search bar uses a free-text model of searching and is not case-sensitive. This means you can enter any portion of a patient's or practitioner's name, email, or phone and expect results.
Search by Name
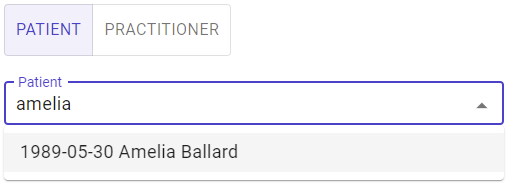
For example, with the selector set to Practitioner, entering the letter C will return all practitioners with the letter c or C anywhere in their name. Similarly, with the selector set to Patients, entering amelia in the search will return all patients with any case variation of the name amelia. To search, set the selector to Practitioner or Patient and begin typing.
Search by Phone
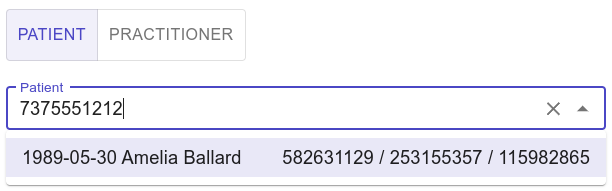
The search field can also be searched by phone number. For phone numbers, simply enter any portion of the 10-digit phone number. There is no need to use dashes or parenthesis; simply enter a portion of the undecorated phone number such as 7025551212. If less than 10 digits are entered, results containing the consecutive phone numbers will appear in the search results. For example, entering "702" could return numbers like 7025551212, 5127021234, 5125551702...
Search by Email
The search field can also be searched by email. Search by email is triggered with the inclusion of the @ symbol. For example, if you enter the word support, the system will search for patient names and emails including the word support. However, if you specify the search as support@ then it will search for all emails including support@. Similarly, if you want to search based on an email's suffix/domain, you could search for something like @mydomain.com.

Search by Date of Birth (DOB)
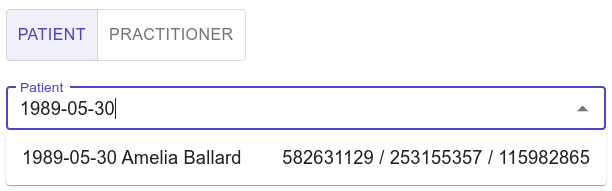
The search field can be searched by date of birth. For a DOB search, the entire DOB must be entered using dashes (-) to separate the date units. For example, a DOB of May 30, 1989 would be entered as 1989-05-30.
Search by MRN or Alternate Identifier
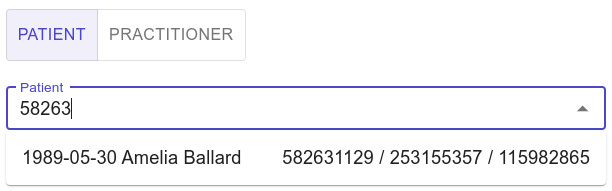
The search field can be searched by medical record number (MRN) or other IDs assigned by the EMR/EHR system. For MRN or other identifiers, simply start typing the MRN or alternate identifier.
Viewing and Editing Results
Once a result has been selected, the dashboard will display its properties. The properties on this page include the contact methods such as phone or email, preferred language, as well as any additional recipients, their contact information, and their preferred language.
If a patient has no active contact methods (not set to IGNORE), a warning will appear on the screen indicating there are no active methods to contact the patient.
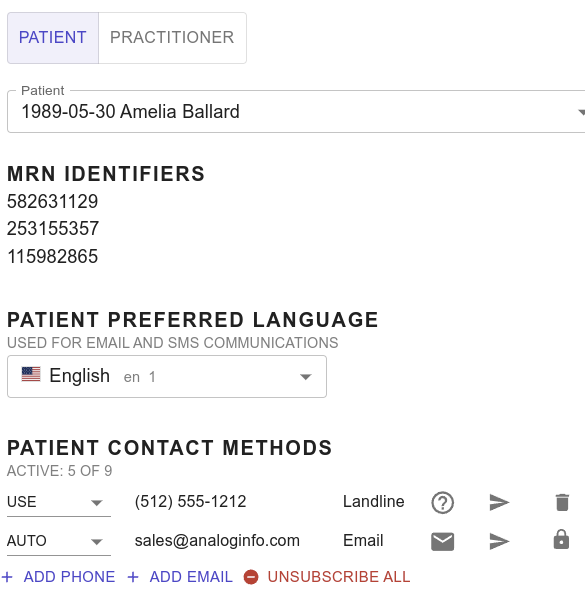
Patient Preferred Language
Preferred languages are auto selected based on the demographic information obtained from the EMR/EHR. All communications will be sent using this language modality. All patient recipients will automatically inherit this setting as well. If no language is defined the system will default to English. If desired, office staff or the patient can go the user's profile and force an alternate language selection.
Patient Contact Methods
Contact methods can include email and telephone. If a number is added, the system will attempt to resolve the type of phone number it is, such as landline or mobile. If a mobile number is detected, the number may be used to send SMS or voice messages; SMS messages will be preferred. If multiple contact methods of the same type are created, like multiple emails, or multiple mobile numbers, they will be attempted in the order listed.
All new entries added via EMR import will be set with a use type of AUTO (left column). This indicates the system will decide which method (email, SMS and type of SMS/MMS, or voice) to use and what order to try them in. If it is desired to force a particular method, click on the type field to the left of the email/phone and choose a desired method. Methods added manually through the system will use the method selected when added but can be changed later.
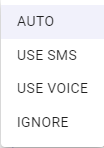
The options available will change depending on the type of method you select and will be further restricted based on the customer's cost plan:
- AUTO - default for all items imported via the EMR, the system will attempt to use the best method(s) with respect to the customer's cost plan.
- USE - if a landline is detected, this option will force the system to prefer this method of communication.
- USE SMS - if a mobile number is detected, this option becomes available and will force the number to be used for SMS messages only.
- USE VOICE - if a mobile number is detected, this option becomes available and will force the number to be used for voice messages only and will not send SMS messages to it.
- IGNORE - explicitly excludes this method from any and all communications from the system.
Use the trash can icon ![]() to delete a piece of information that was added through the system. Use the paper airplane/send icon
to delete a piece of information that was added through the system. Use the paper airplane/send icon ![]() to send a test message to the target email address or phone number. Use the pencil/edit icon
to send a test message to the target email address or phone number. Use the pencil/edit icon ![]() to edit the target email address or phone number. Items with a lock icon
to edit the target email address or phone number. Items with a lock icon ![]() are derived from the EMR system and cannot be edited.
are derived from the EMR system and cannot be edited.
Select UNSUBSCRIBE ALL to opt out of communications on all methods by setting all methods to IGNORE.
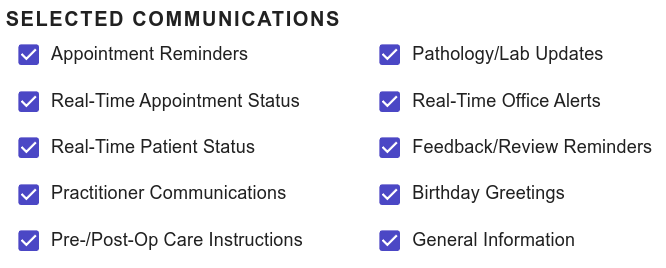
Selected Communications
Enable or disable selected communications to receive a particular communication type for all enabled patient and recipient methods. Selected elements ![]() are defined as the preferred types of communications to send while deselected ones will not be used.
are defined as the preferred types of communications to send while deselected ones will not be used.
When working with practitioners instead of patients, the selected communications options are different:
- Office Communication - Updates about the office.
- Appointment Real Time Updates - Updates to doctors about patients checking in or canceling their appointments.
- Lab Updates - pathology updates for patients.
Adding/ Editing an Authorized Recipient
Recipients are also referred to as Non-Patients when sending messages and reminders. Recipients are additional people whom the patient would like notified of updated medical statuses in addition to themselves. A recipient will have a telephone phone number and email address. To add additional recipients, click the ADD RECIPIENT button under PATIENT AUTHORIZED RECIPIENTS. You will be prompted for a name, ten (10) digit phone number, and an email. You may also configure the preferred language for this recipient as well as the types of communications the recipient will receive. The form is dynamic and will show a selection for communication preferences once options such as phone or email have been added to the form. Click SAVE when done.
By default, the authorized recipient will use the same language as the patient. This can be overridden on a per-recipient basis by either the front desk staff or the patient.
If a patient has no active recipients, a warning will appear on the screen indicating "Patient has no 3rd party, authorized message recipients".
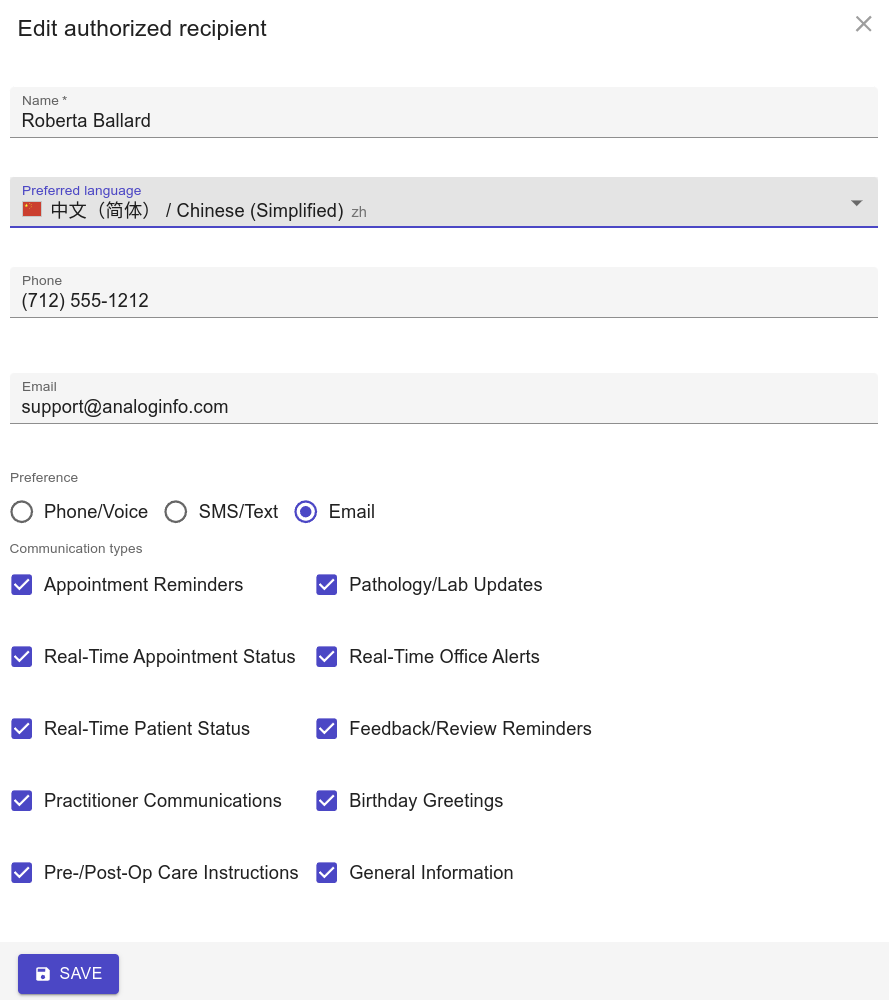
Recipients have their own communication settings, distinct from the patient. When added, they are initially configured to allow all communication types. To edit the types of subscriptions a recipient is enabled for after they are added, simply click the edit link ![]() to change them.
to change them.
